I may get a paid commission for purchases made after clicking a link in this post, click here to read my disclosure.
Implementing email automations is a really great way for bloggers to generate traffic and high-quality leads to find their target audience.
With email automation,
You can easily create highly personalized email experiences from welcome messages to re-engagement email campaigns that improve your open rates, boost engagement with customers, and ultimately help build relationships with your readership.
Additionally, you can take advantage of triggered emails like product recommendations or abandoned cart recovery emails that allow you to drive more sales using automated sequences.
Making the most of email automation in MailerLite is easy and the benefits are sure to positively impact both clients and bloggers alike.
In this tutorial, we will be looking at a step-by-step on how you can create simple email automations for your blog to help increase your blog readers and bring more eyes to your content.
What are Email Automations?
Email Automation is an efficient solution for email marketing and communications that streamlines the process of email delivery.
It simplifies repetitive email-sending tasks while allowing significant customization.
By using email automation, businesses can send emails triggered by specific actions taken by customers or prospects,
such as making a purchase or meeting a goal in an email campaign.
Powerful segmentation options also exist to ensure more relevant messages are sent to specific groups of people at the right time.
Its benefits can help catalyze growth in any organization and increase customer loyalty due to timely and personalized outreach from a company.
Benefits of Email Automations
Email automation is a powerful tool for bloggers and online content creators.
They can be used to streamline the process of creating, sending, and managing emails,
as well as reaching out to potential readers and customers.
Here are some of the key benefits of email automations for bloggers:
1. Automated Follow-Ups
Email marketing is more effective when you follow up with leads quickly and frequently.
With automated follow-ups,
you can send multiple emails in quick succession without having to manually write each one.
This allows you to nurture leads by reminding them why they signed up first or giving incentives related to their needs or interests.
2. Improved Efficiency
Manually responding to emails or writing newsletters every week can take time away from blogging tasks that require more attention than writing an email like researching topics or creating content
which makes it difficult for bloggers already short on time who want their blog posts published regularly.
Automated emails save time because all you need to do is set up an email once,
then use it over again when necessary with minimal changes if needed along the way.
Plus, if your blog has many subscribers who expect regular updates from you,
automated emails make sure everyone receives timely updates even when life happens and things don’t go according to plan!
3. Notifications and Reminders
Bloggers often have multiple projects going at once; spinning plates just comes with blogging!
Using automated notifications you can set up reminders about deadlines for yourself as well as alert any collaborators on upcoming events or tasks without having to keep track of everything manually via spreadsheets or other methods that aren’t easily accessible whenever needed.
4. Segmented Audience Targeting
You may have different groups of people interested in various types of content within your audience base –
So why waste space talking about a topic not relevant?
With segmentation within automation software such as MailChimp, Campaign Monitor, etc.,
you can create segments such as new subscribers vs long-term followers;
allowing filtering based on characteristics like age, location or interests, etc.,
Helping ensure only those reading will receive tailored information specific enough that they won’t want to unsubscribe anytime soon!
Utilizing email automations enables bloggers to gain higher efficiency levels due to improved organization capabilities enabling better targeting tactics aimed directly at readers looking forward to seeing their messages show up in inboxes every day!
Why Mailerlite?
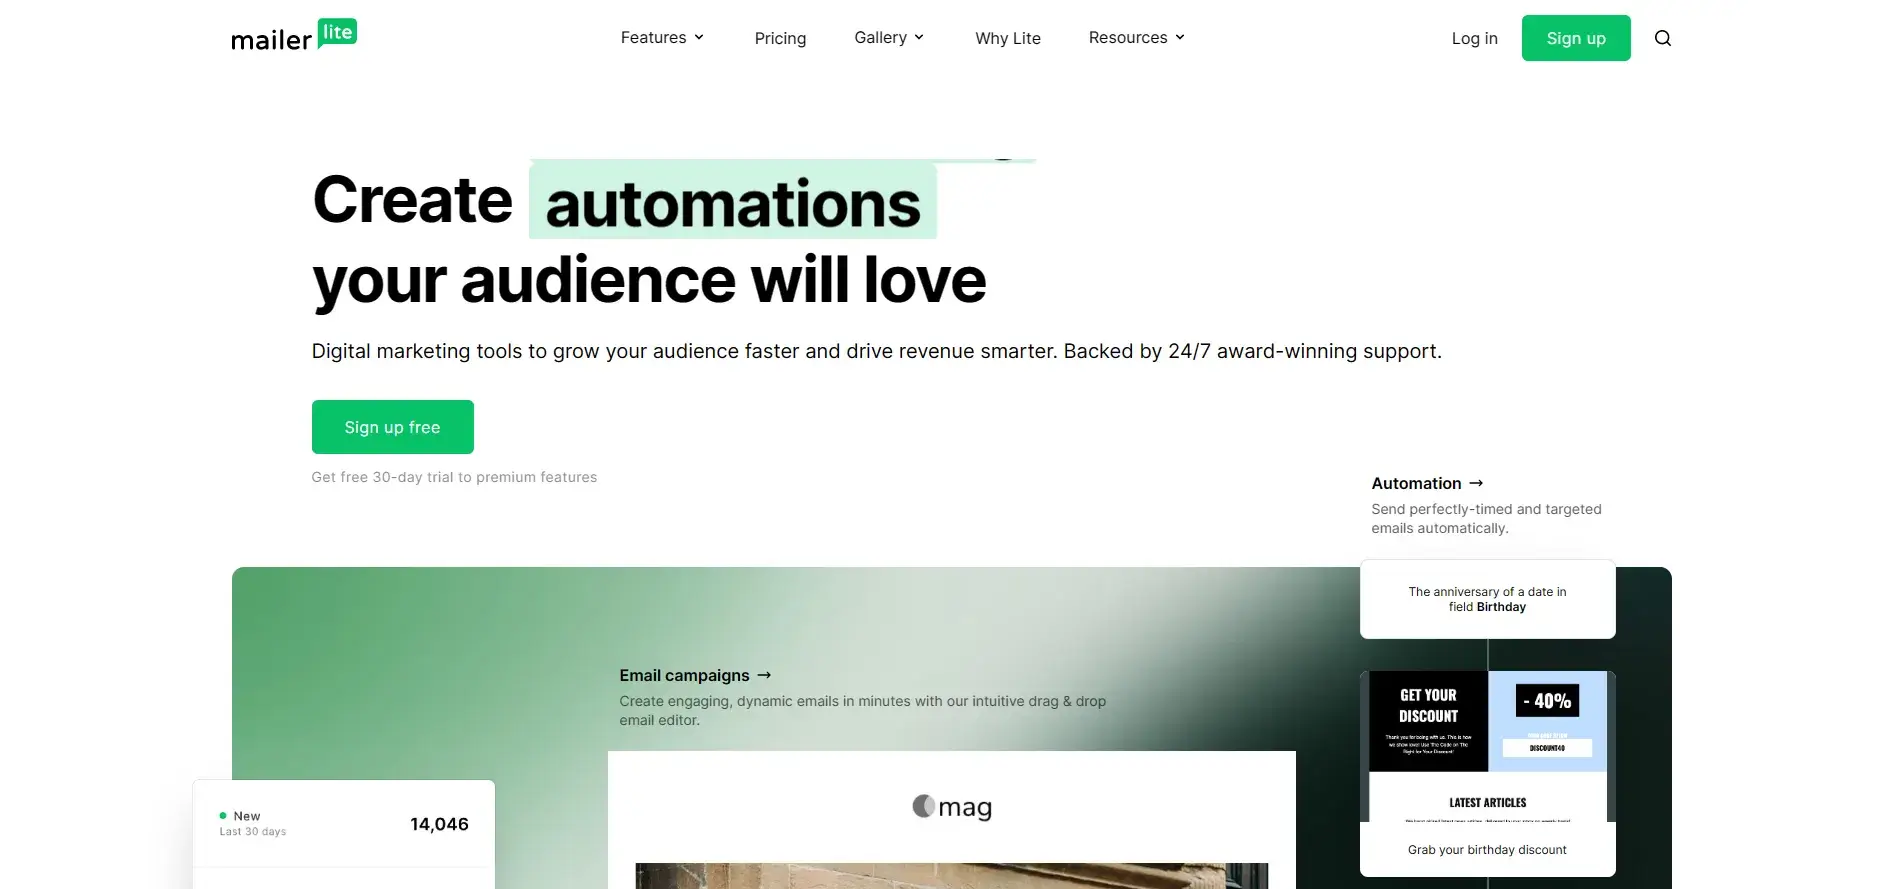
For bloggers looking to leverage email marketing, Mailerlite is an excellent email automation software choice.
It offers user-friendly email campaigns geared for any size email list and has a feature-rich automated email service that allows users to track data on email opens, clicks, and page views.
The software also provides powerful marketing segments powered by AI so you can engage with your subscribers however you’d like.
On top of that,
Mailerlite features an intuitive drag-and-drop email designer with customizable templates and high-resolution images to make sure your emails are both striking and on brand.
With all of these features combined with 24/7 customer support,
Mailerlite is the perfect email automation platform for bloggers wanting success in their email marketing efforts.
How to Set Up Email Automations In Mailerlite
Creating email automation in Mailerlite is a great way to automate your email marketing and improve engagement with your readers.
Here’s a step-by-step guide on how to do it:
Step 1: Create a Free Account On Mailerlite
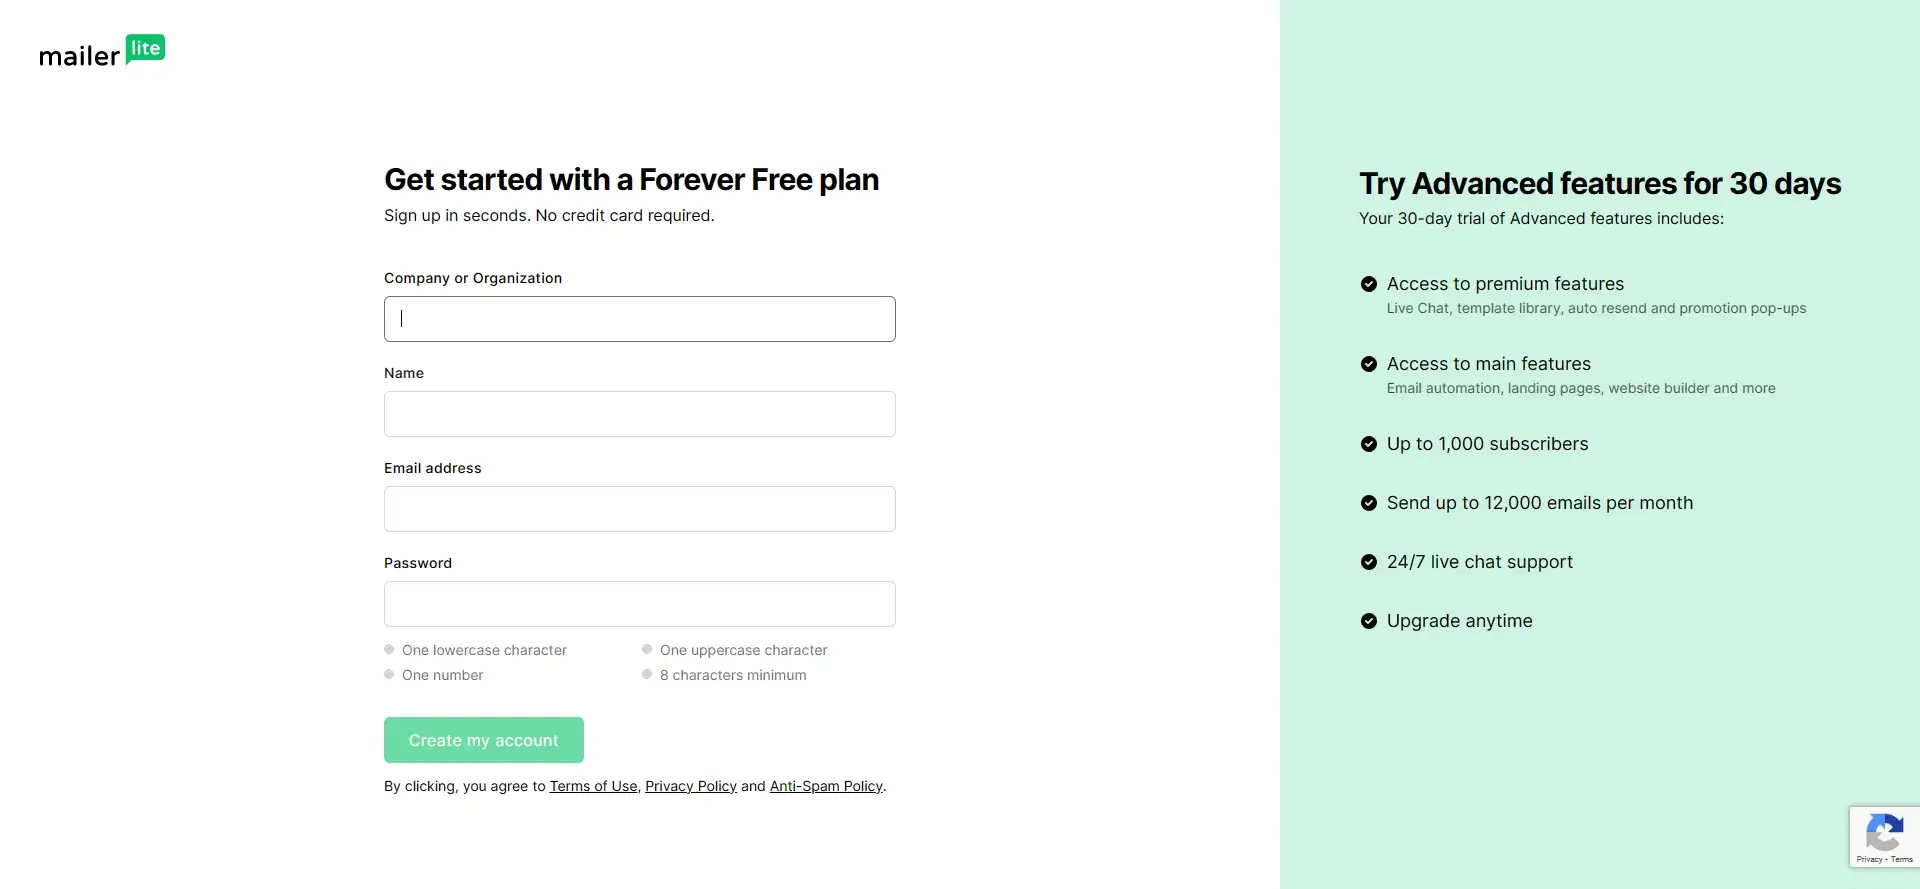
1. Go to the MailerLite website and click on the “Sign up” tab.
2. Enter your email address and create a password, then click on the “Create Account” button.
3. Verify your account by clicking on the link in the verification email that you will receive from MailerLite.
4. Once your account is verified, you can now log in
Step 2: Log into your Mailerlite account
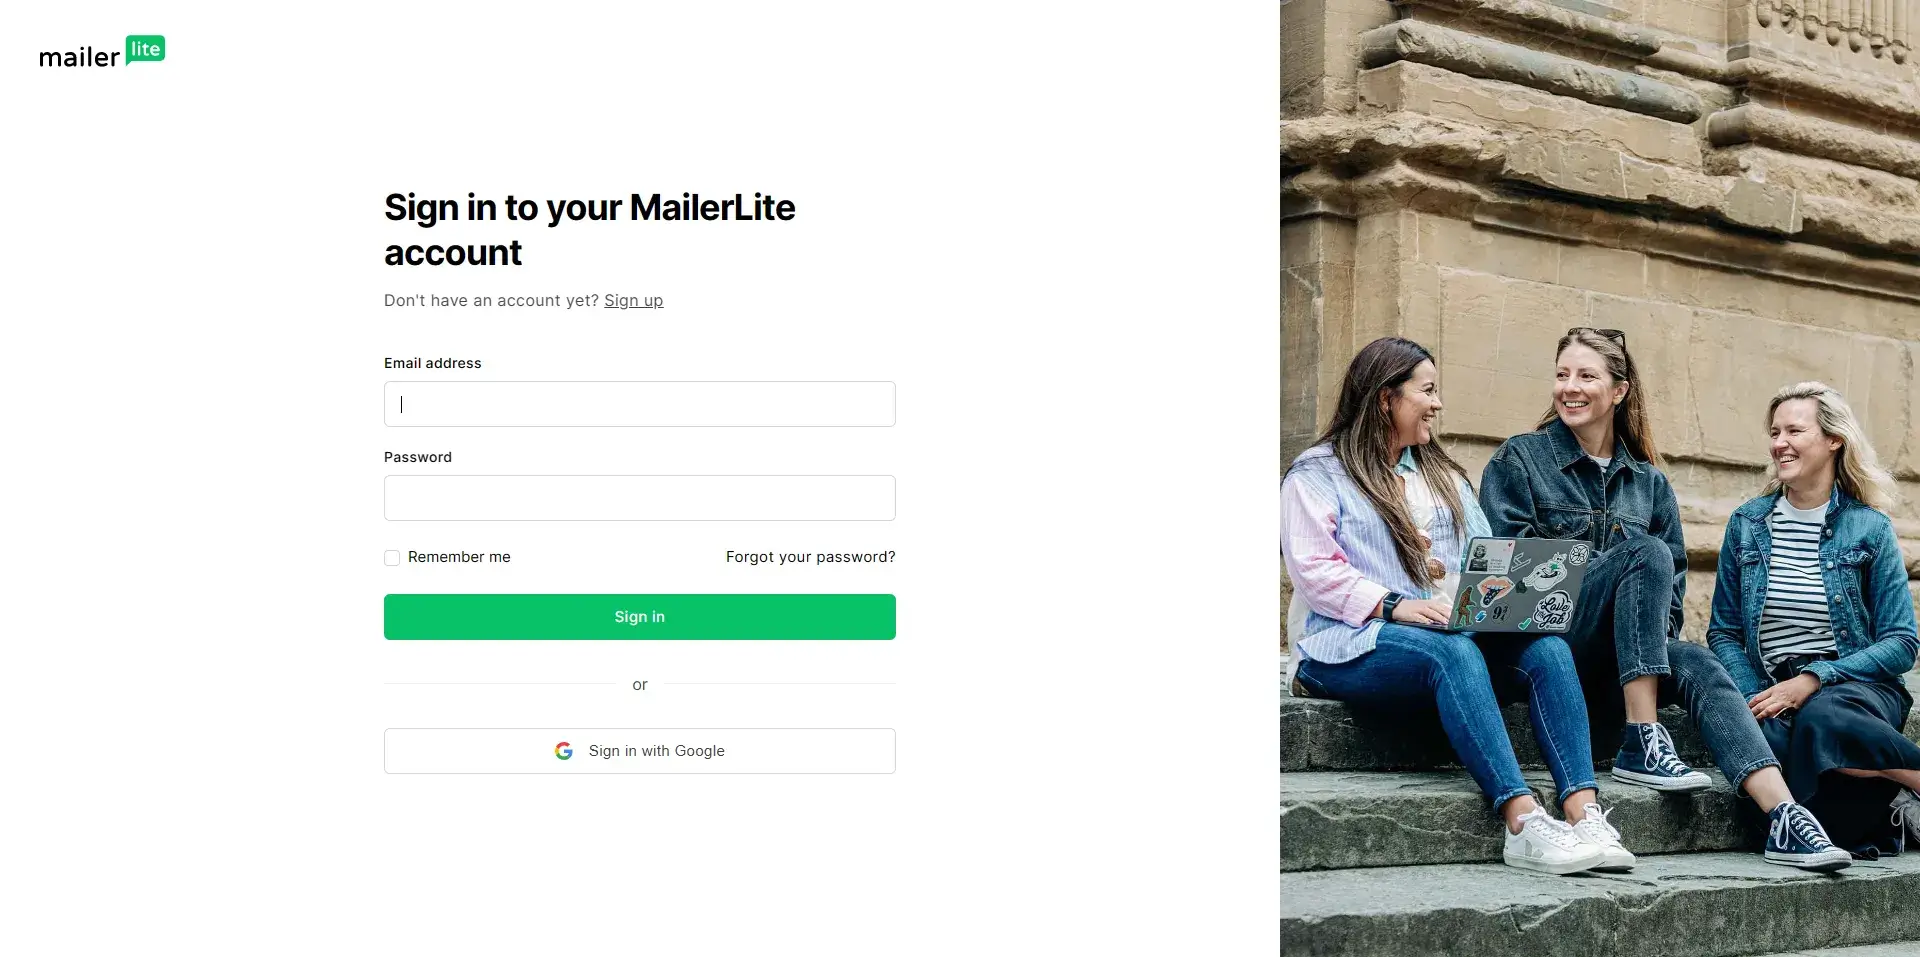
1. Enter your email address in the “Email” field and click the “Log in” button.
2. Enter your password in the “Password” field and click the “Log in” button.
Step 3: Click “Create New Automation”
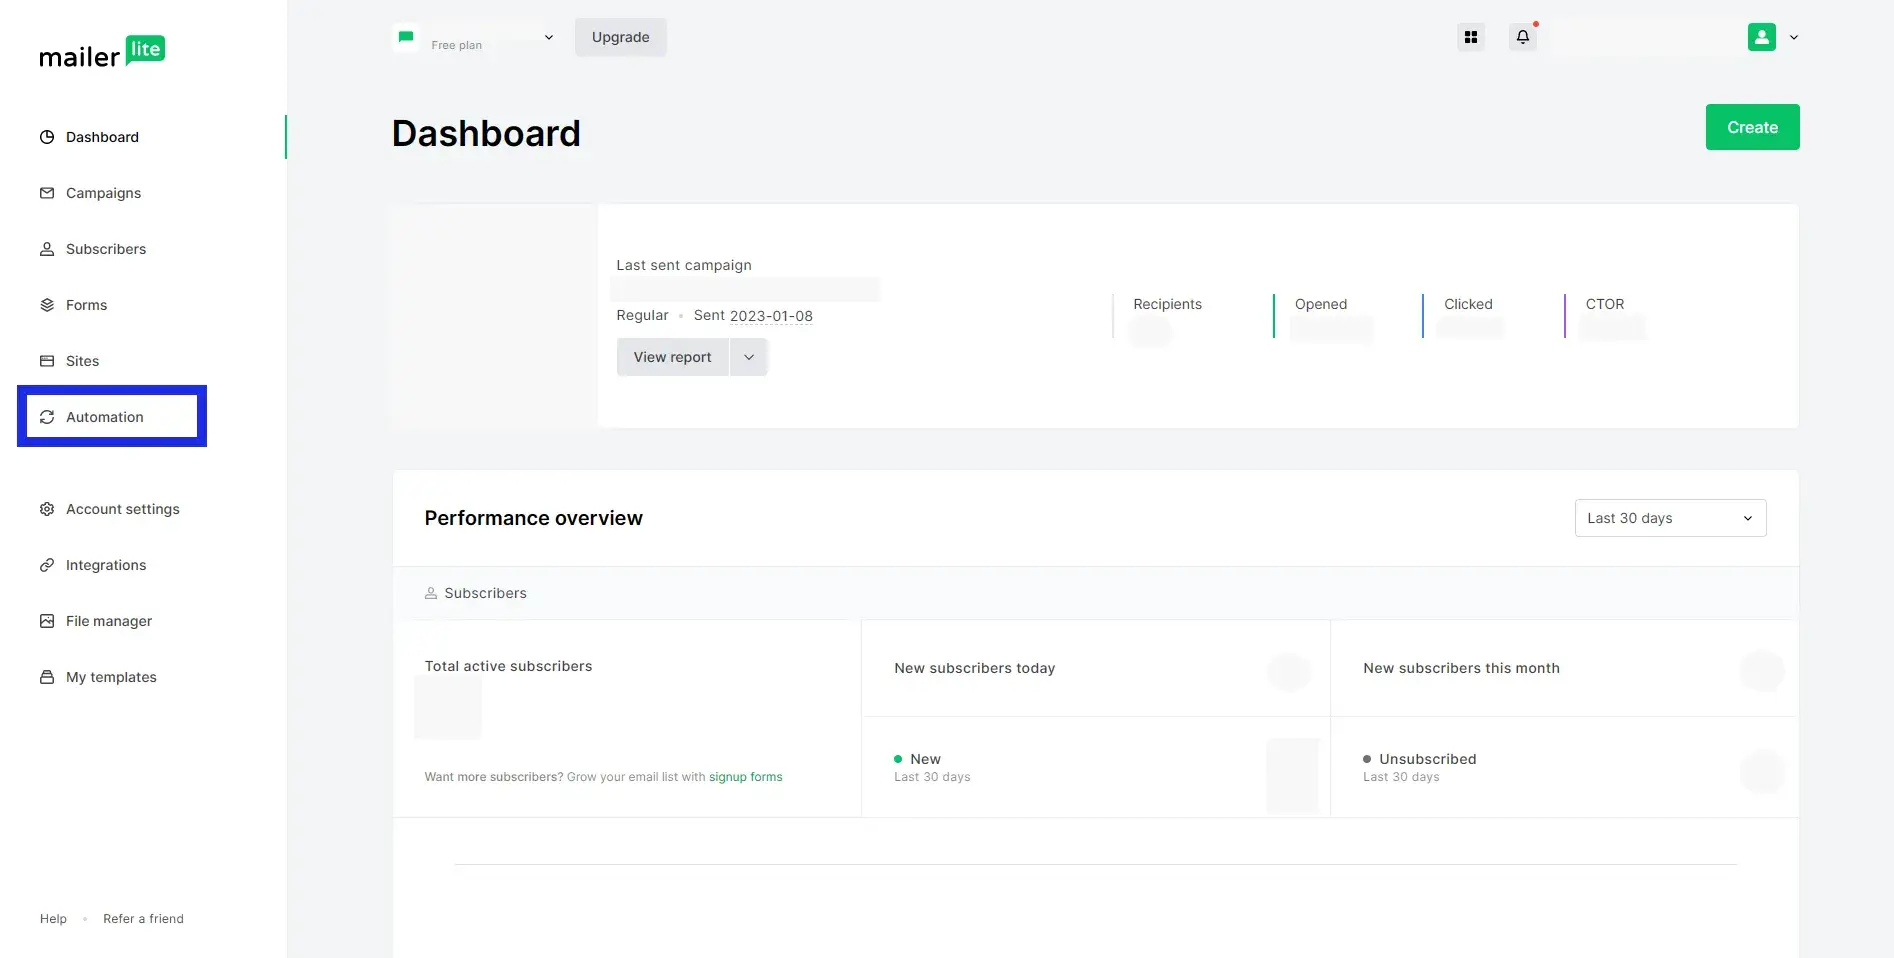
To get started,
you want to go ahead and click on the automation button at the right menu
This will open up the automation dashboard where you can see already active automation or create a new one
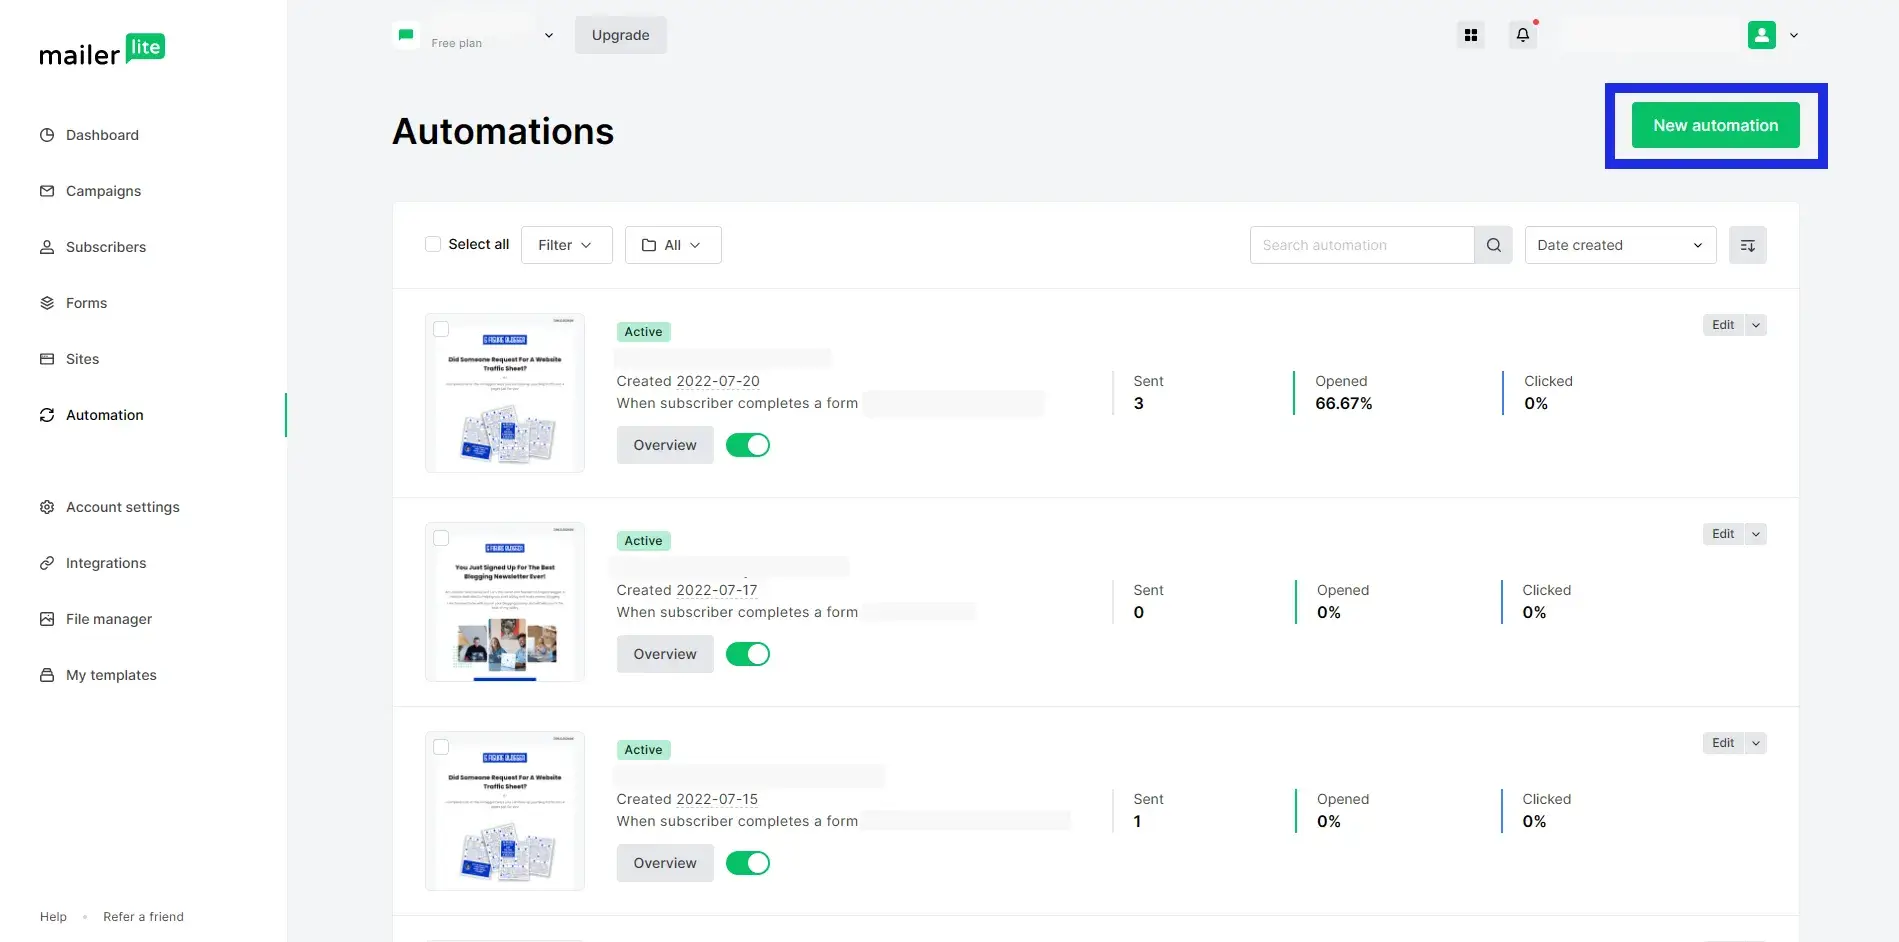
You want to go ahead and click on the new automation button at the top right corner to create a new automation
Step 4: Choose a Template
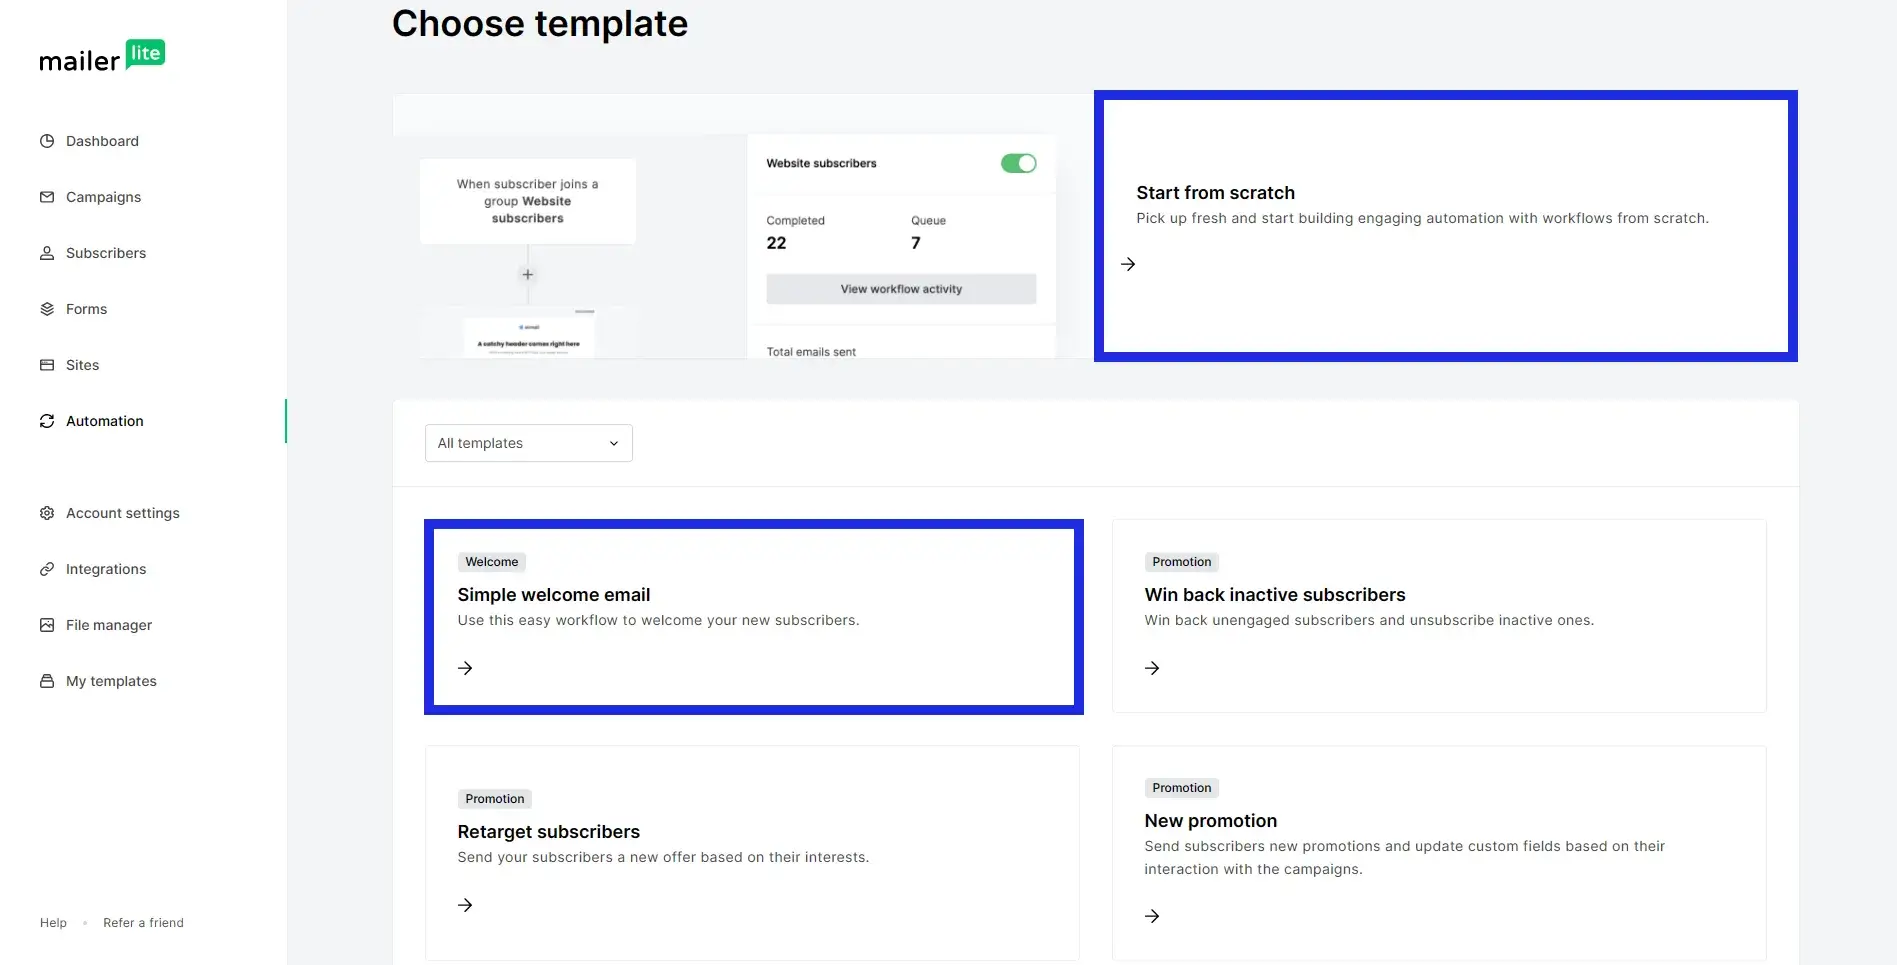
The next step is to Choose how you would like to create your automation,
You can either start from scratch or use an existing template which is a lot easier and does not require any technical setup
For the purpose of this tutorial, we will be using a template,
so go ahead and click on the template of your choice to get started
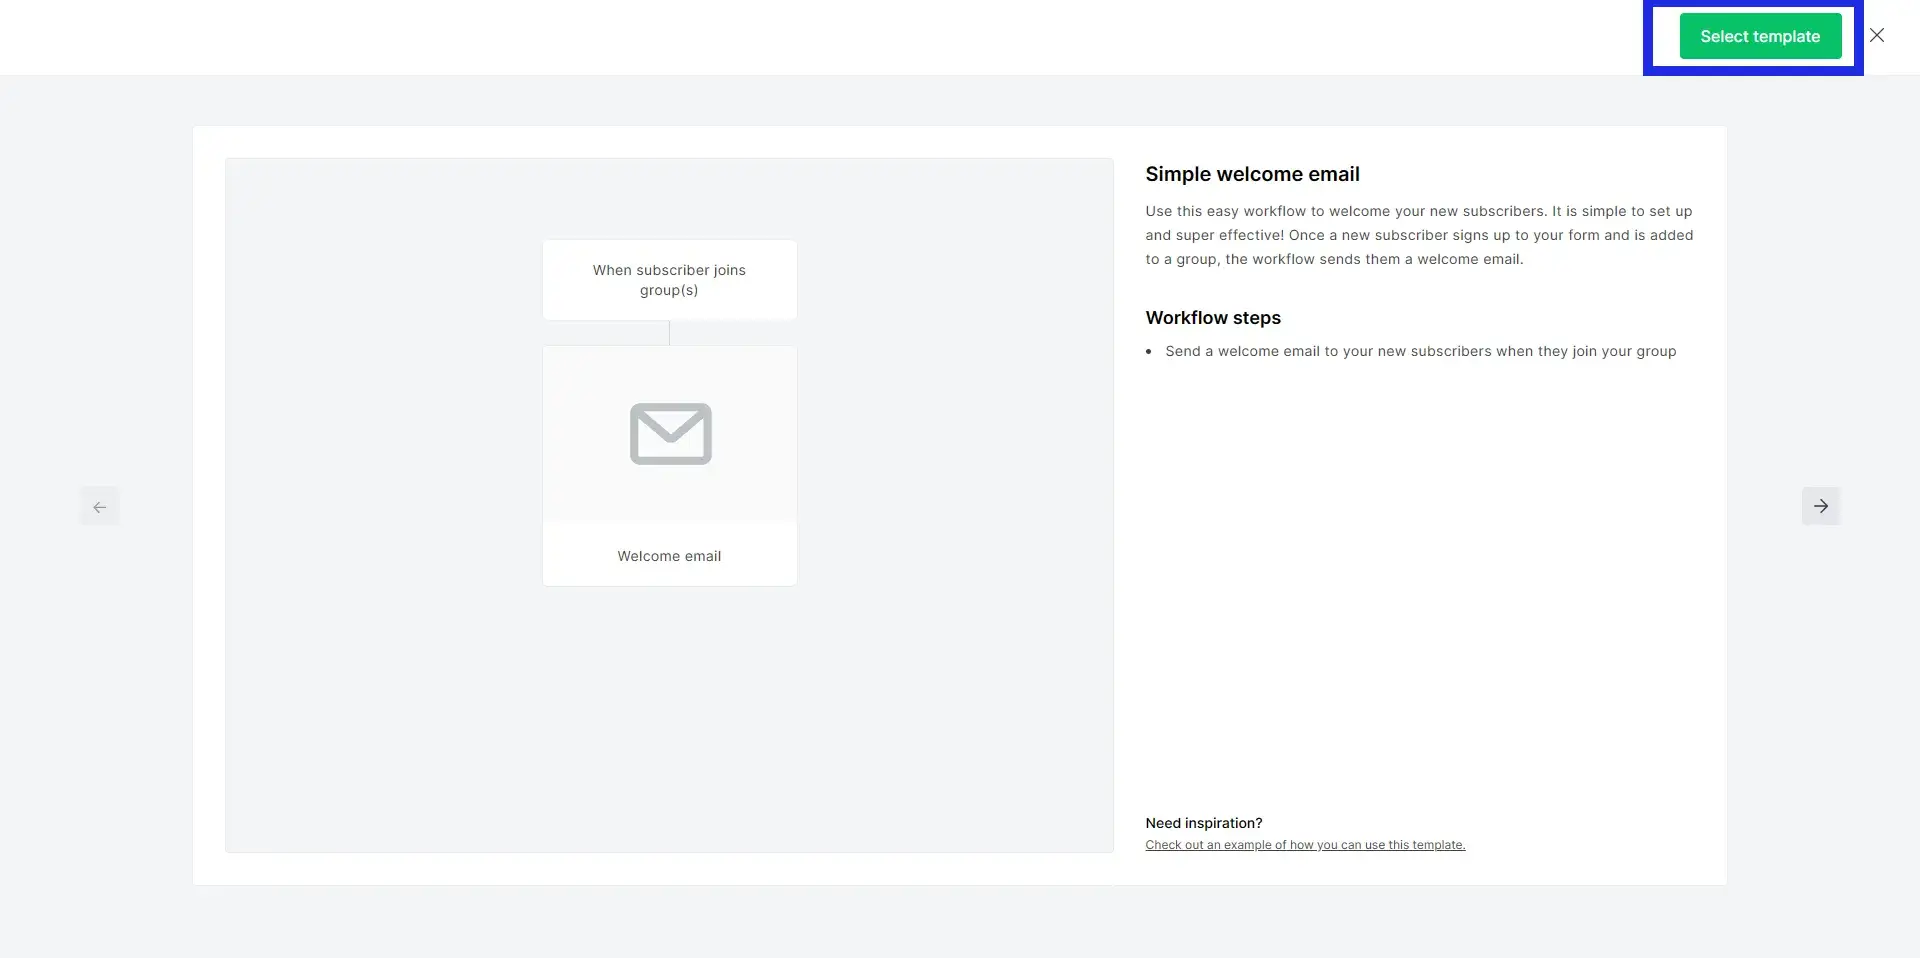
You will be directed to the automation workflow page
This is where you can create and manage what happens before and after your readers receive your email automation
Step 5: Customize Automation Settings
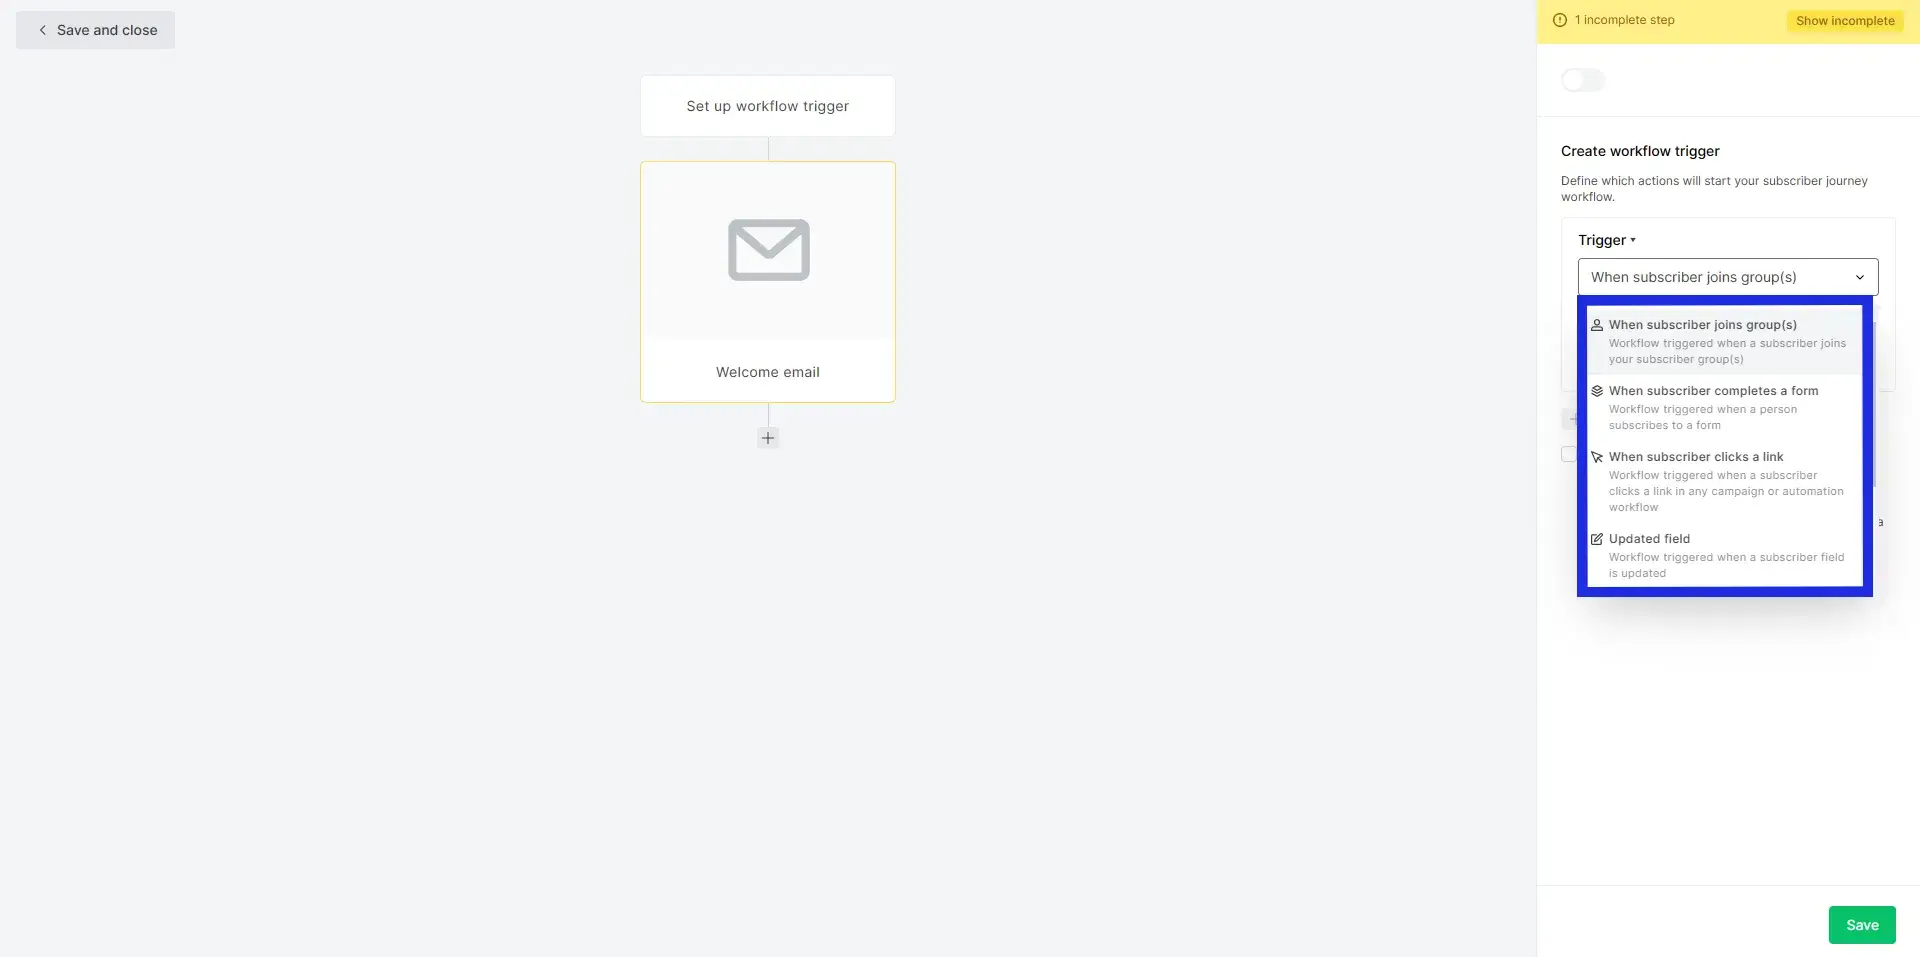
Here you can specify how to select readers that will receive this email automatically,
It could be when someone new subscribes to your blog or when someone completes a form, joins a group, etc.
Depending on the type of email you are creating for the automation, you need to choose your trigger accordingly,
For example, you don’t want to send a welcome email automation to an already existing blogger who just wants to get a copy of your new ebook,
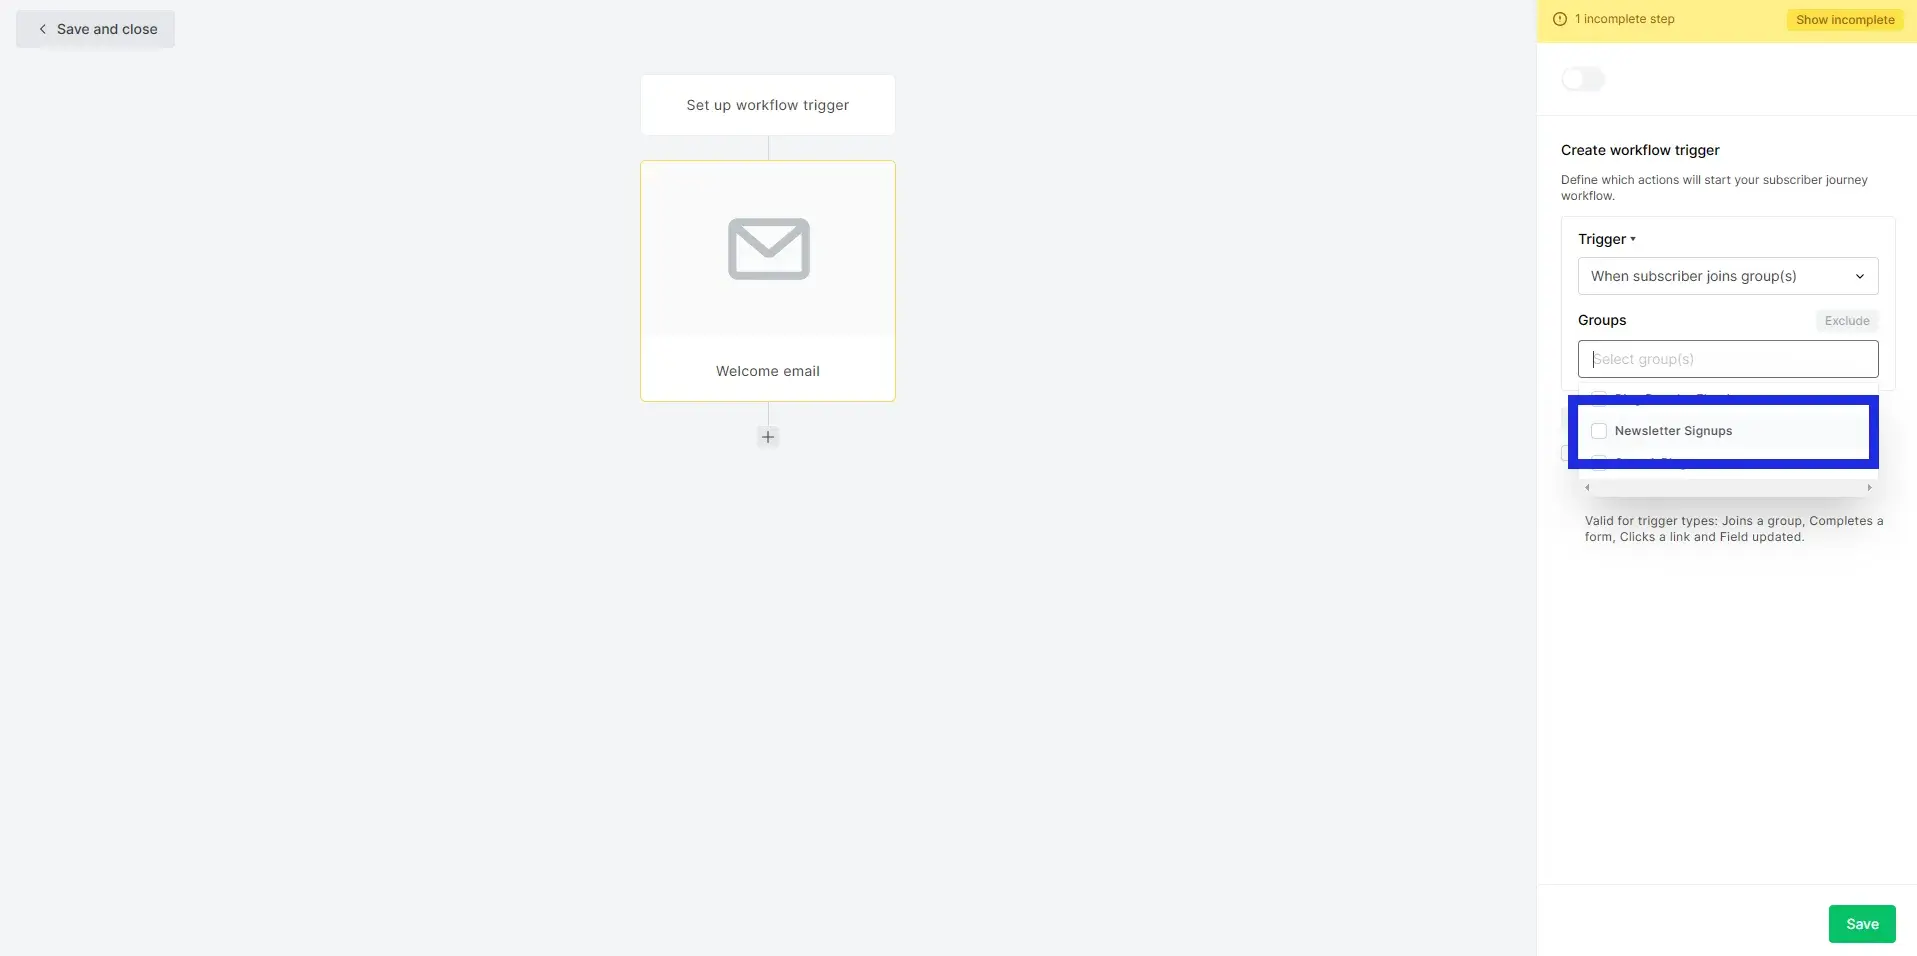
Next, you can choose which groups you would want to exclude from receiving this automated email,
For example,
If your automated email is focused on promoting a weight loss fitness product,
you want to send it to subscribers who signed up specifically for weight loss and not to people who sighed up for weight gain tips.
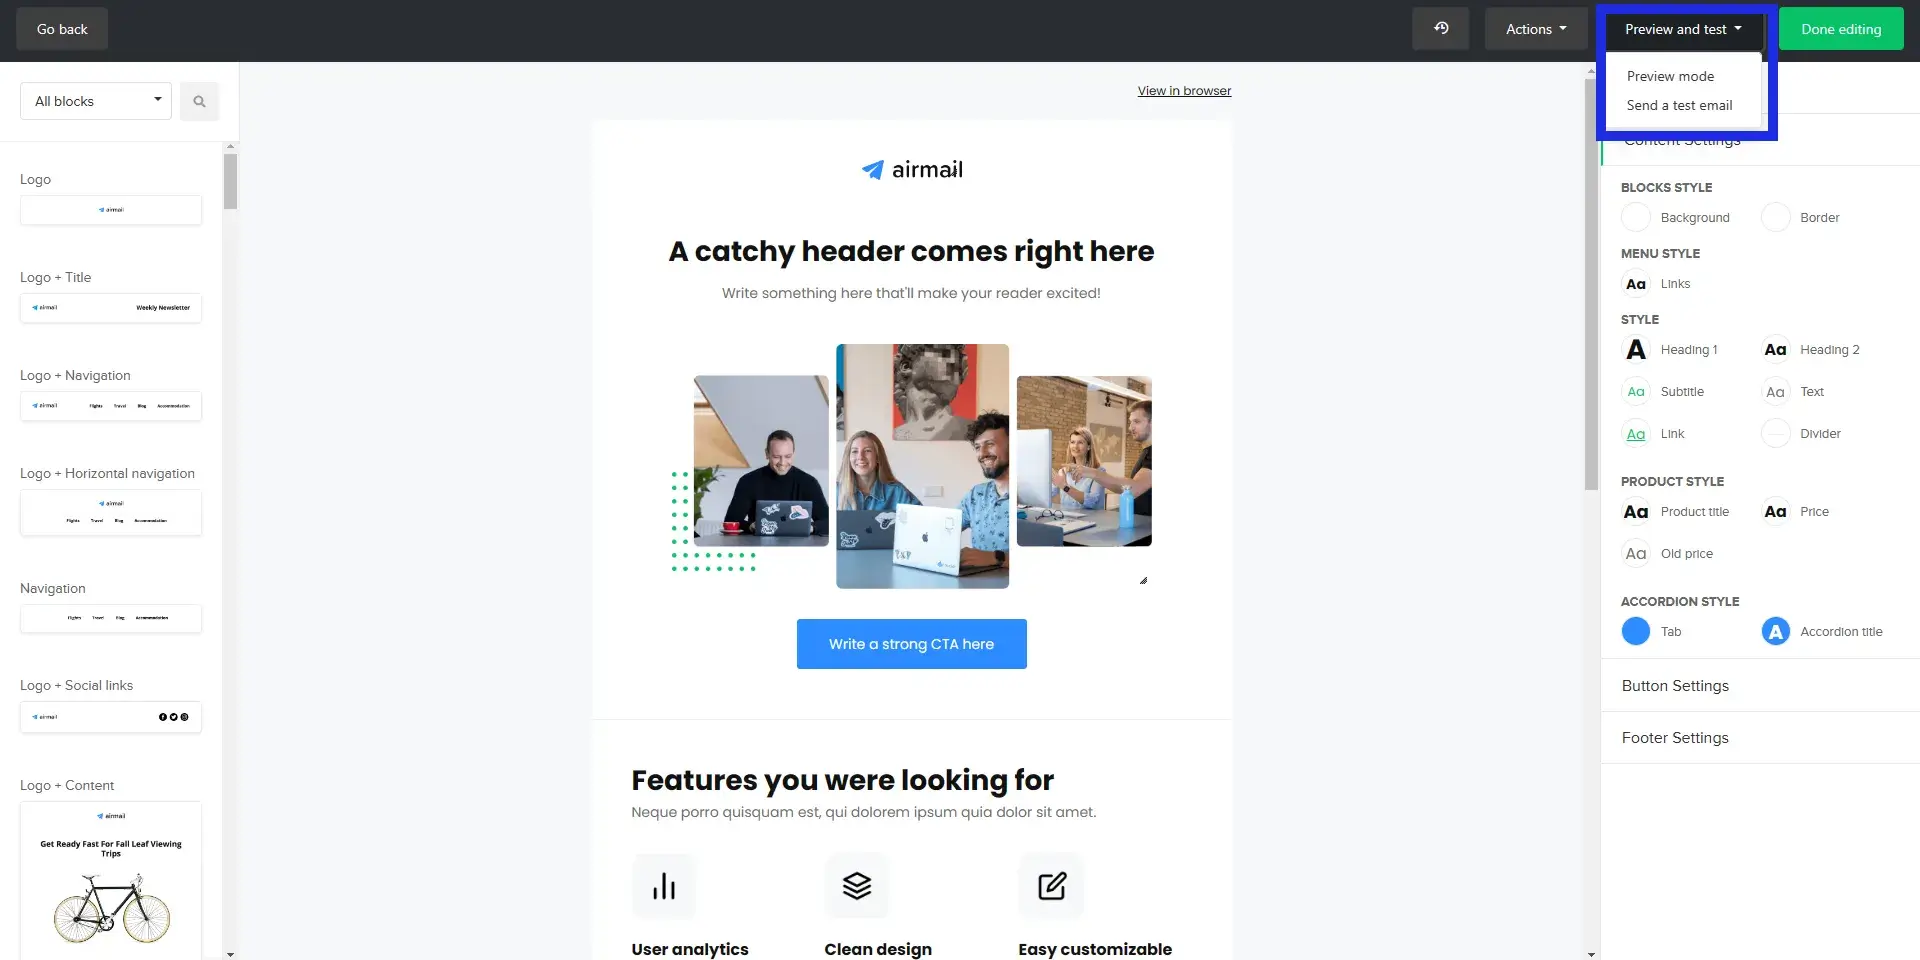
Step 6: Design Automation Email
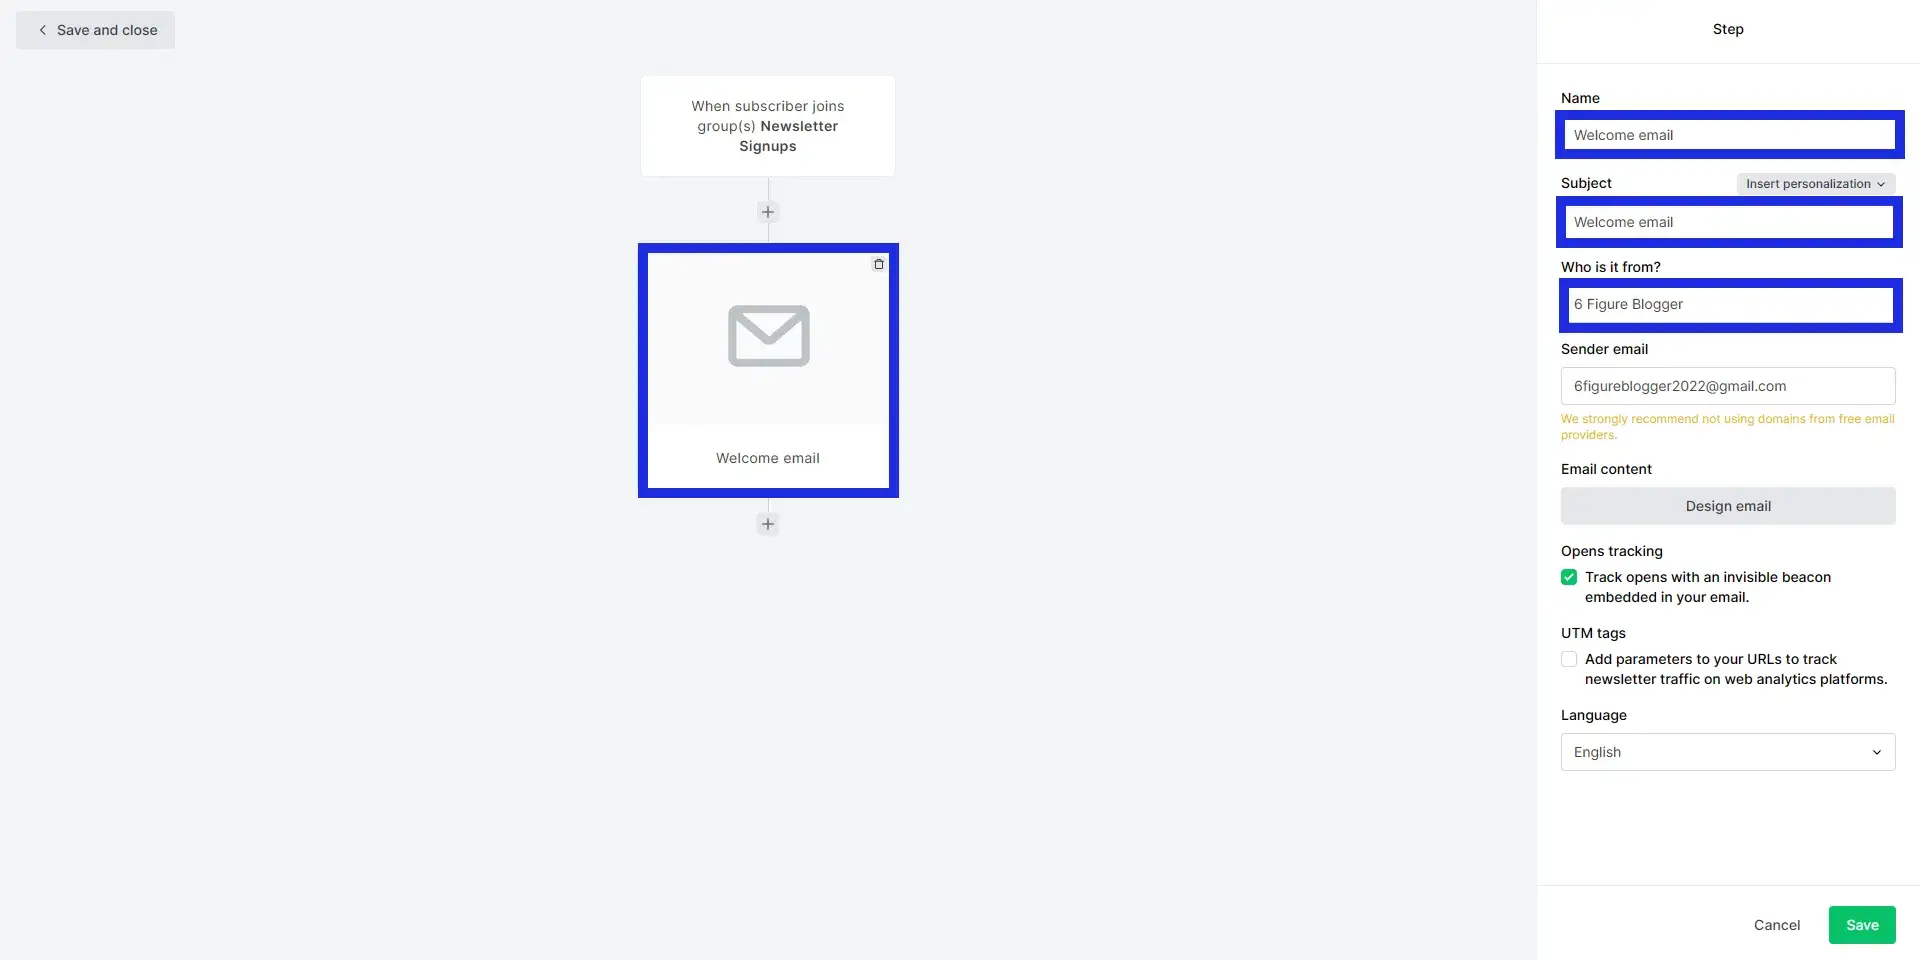
Next, you need to specify the name of the email automation you are creating,
The subject that displays at the top before the user opens up the email, and who the email is from, here, you can just enter your blog name.
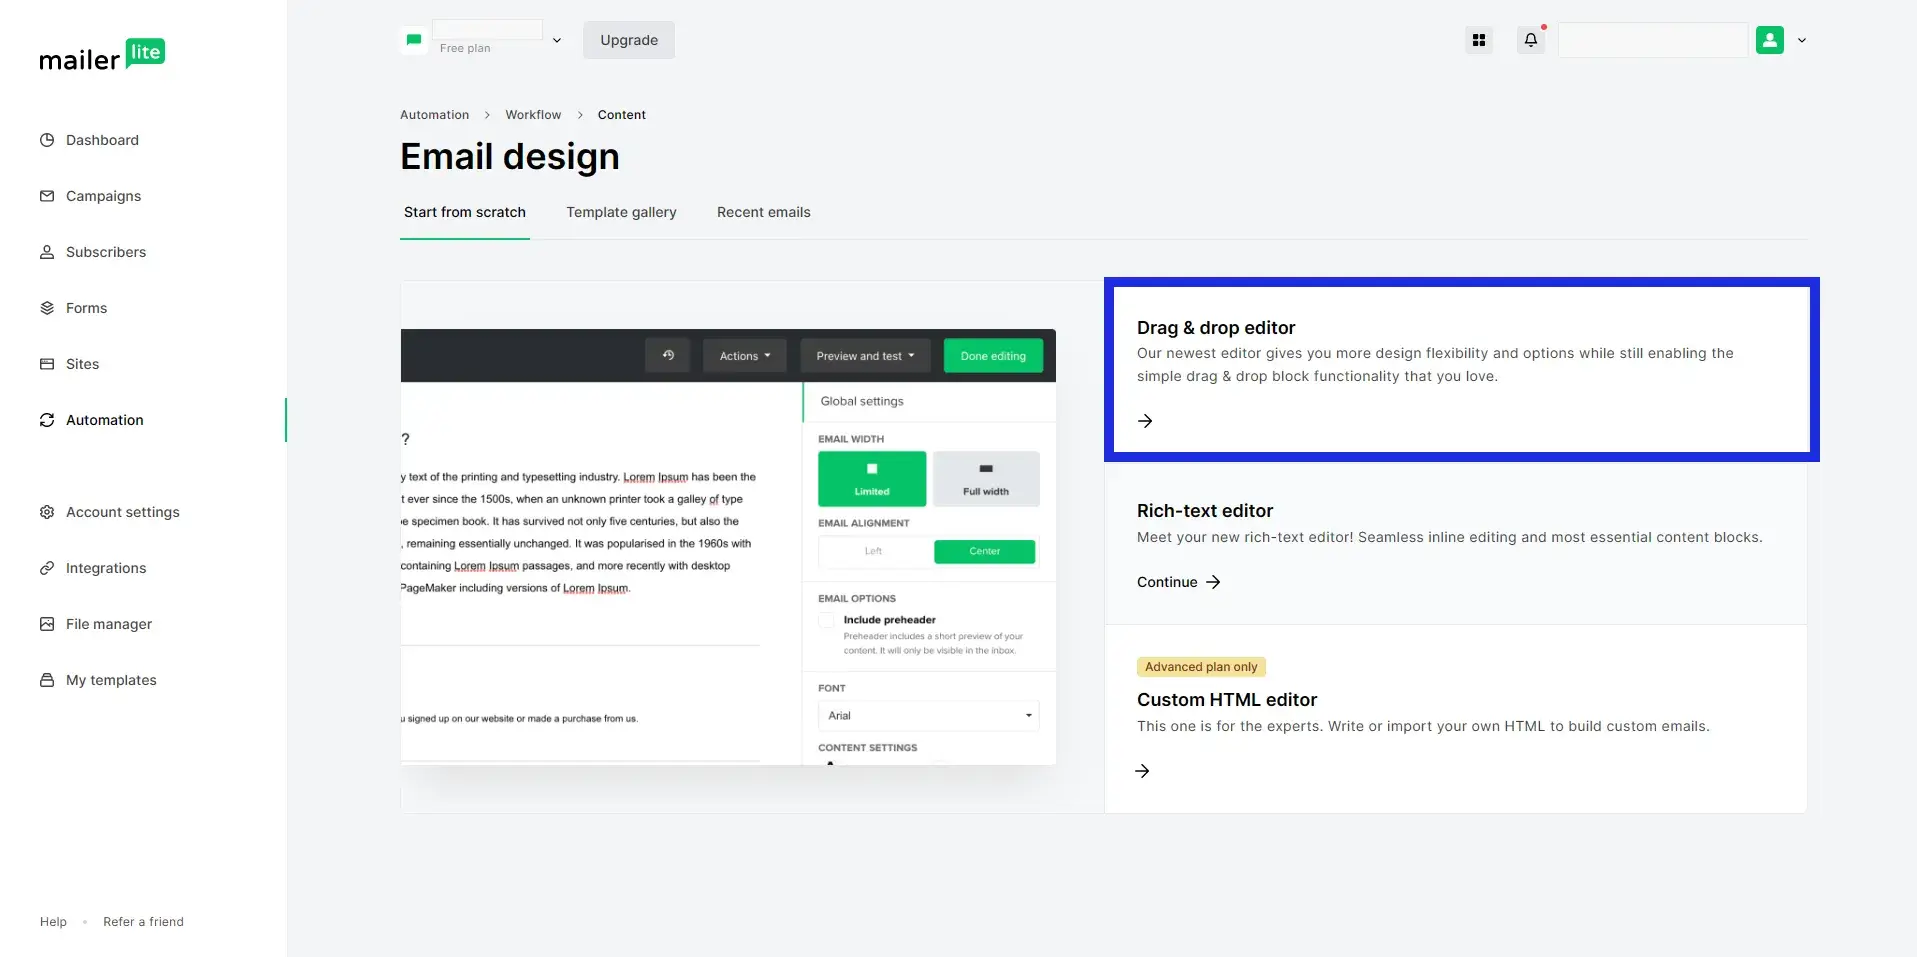
The next step is to design your actual email,
There are 3 ways to do this,
you can either use the drag-and-drop editor, which is way easier, especially if you are non-techy,
or you can use a rich text editor or the custom HTML editor perfect if you have knowledge of HTML programming language.
Click on the option most comfortable for you,
for the purpose of this tutorial,
we will be using the drag-and-drop editor,
after clicking,
You will be directed to the design dashboard.

On the design dashboard,
you can specify things like the text formatting, design style, button settings, and heading add or remove blocks, and most importantly,
make your email attractive and irresistible to the reader
Feel free to customize the templates as you wish by adding or deleting things that you don’t need from the email design until it looks nice.
Step 7: Preview your Email
After designing your email and you are completely satisfied with what you have,
the next step is to preview your email,
The preview lets you see how your email looks if it was displayed on a mobile device, tablet, or desktop device,
A good email design should look really great across all screen sizes and viewports, without appearing too small or too large on a specific screen size,
If you are satisfied with how it looks on both screen sizes,
then you want to proceed to the next step.
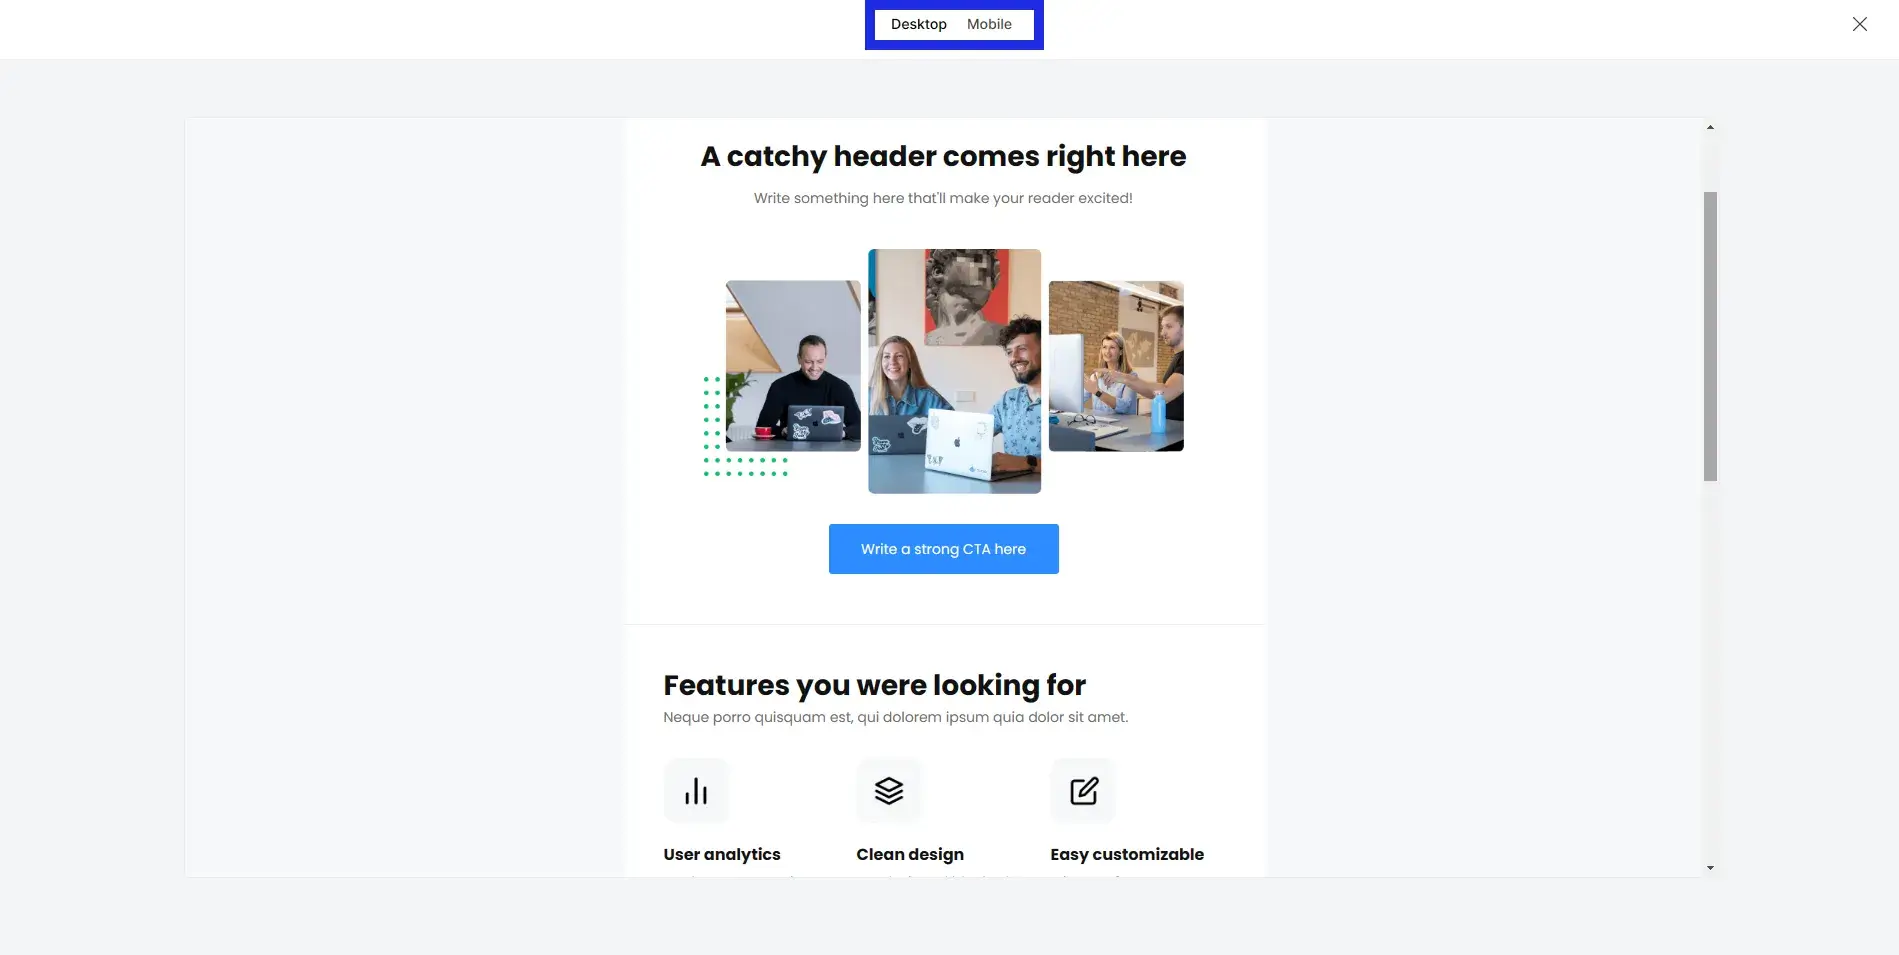
You can toggle back and forth between desktop or mobile views to compare how it looks on both viewport sizes and make the necessary changes if needed,
If you are fine with it, then you can go ahead and send a test email,
The reason you want to send a test email is to make sure that the email automation can be delivered to different email servers and that the reader can see it without it going directly to their junk or spam folder.
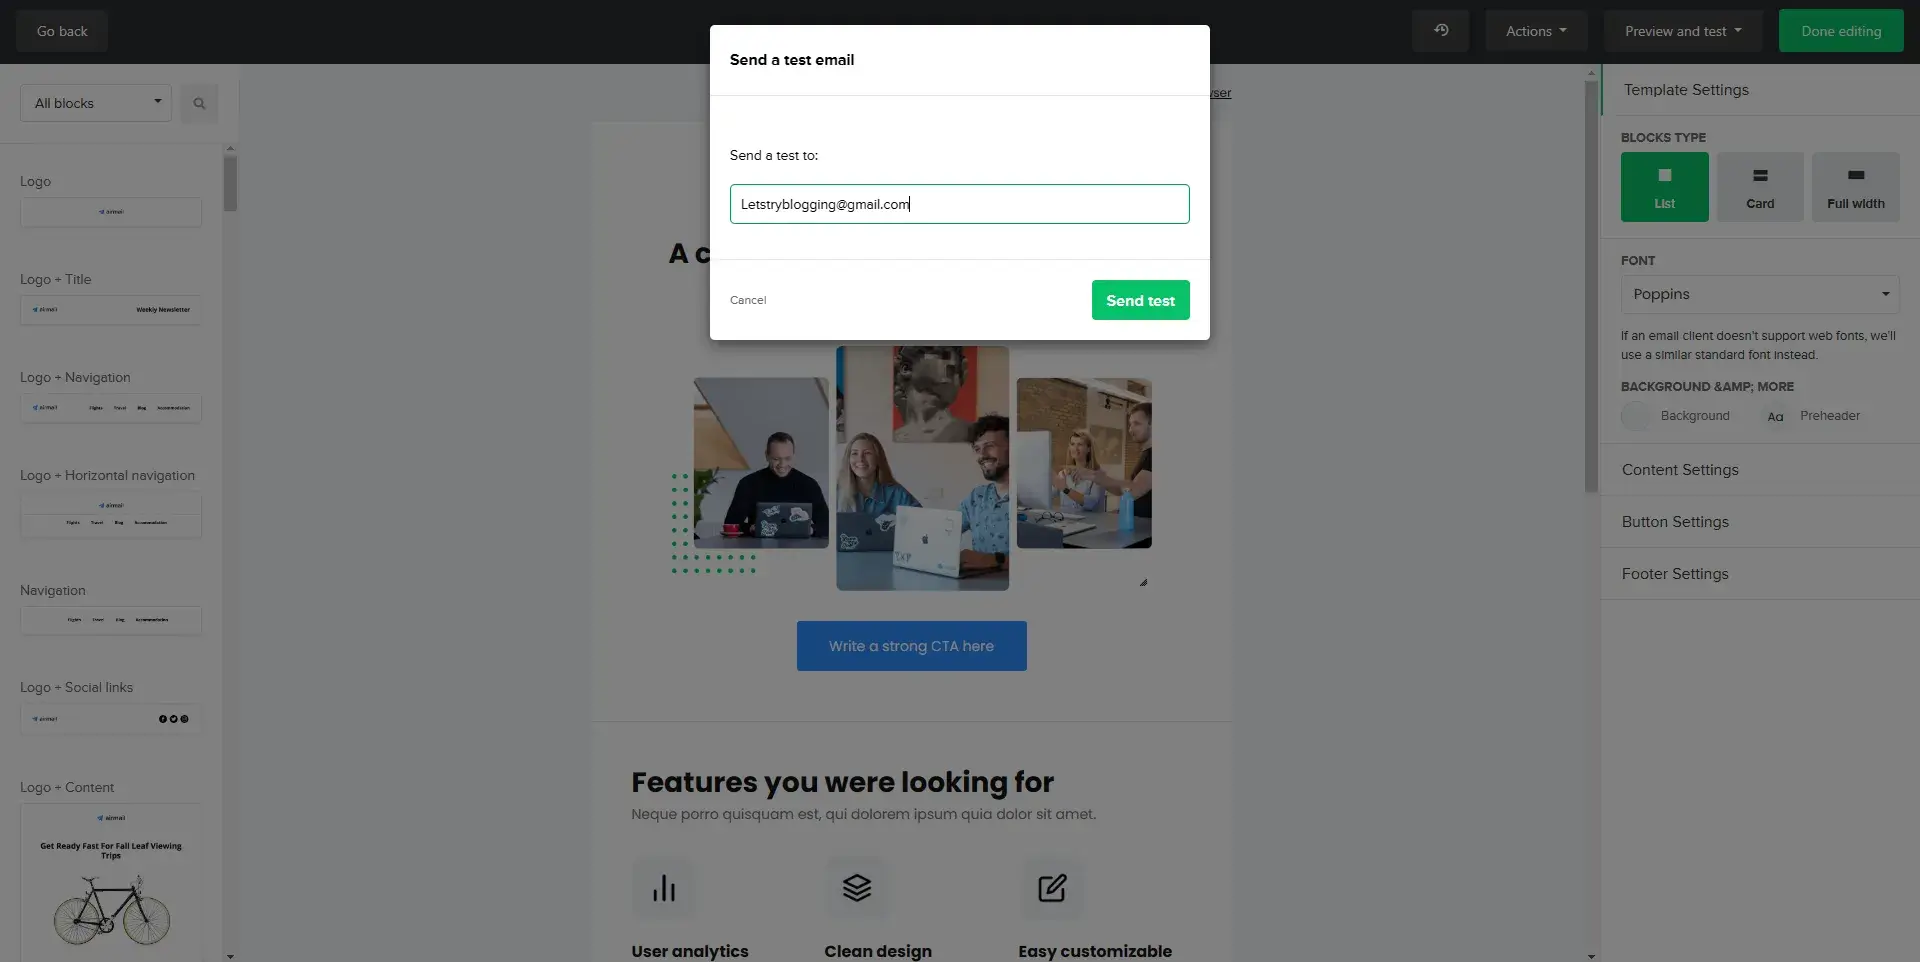
For this reason, try to switch between different email servers by sending the test email to an @gmail.com email, @hotmail.com email, or @outlook.com email to make sure that different readers using any email server can see your email.
If everything looks great and your email test goes well,
the next step is to click the done editing button to save your email and go back to the email workflow.
Step 8: Click “Activate”
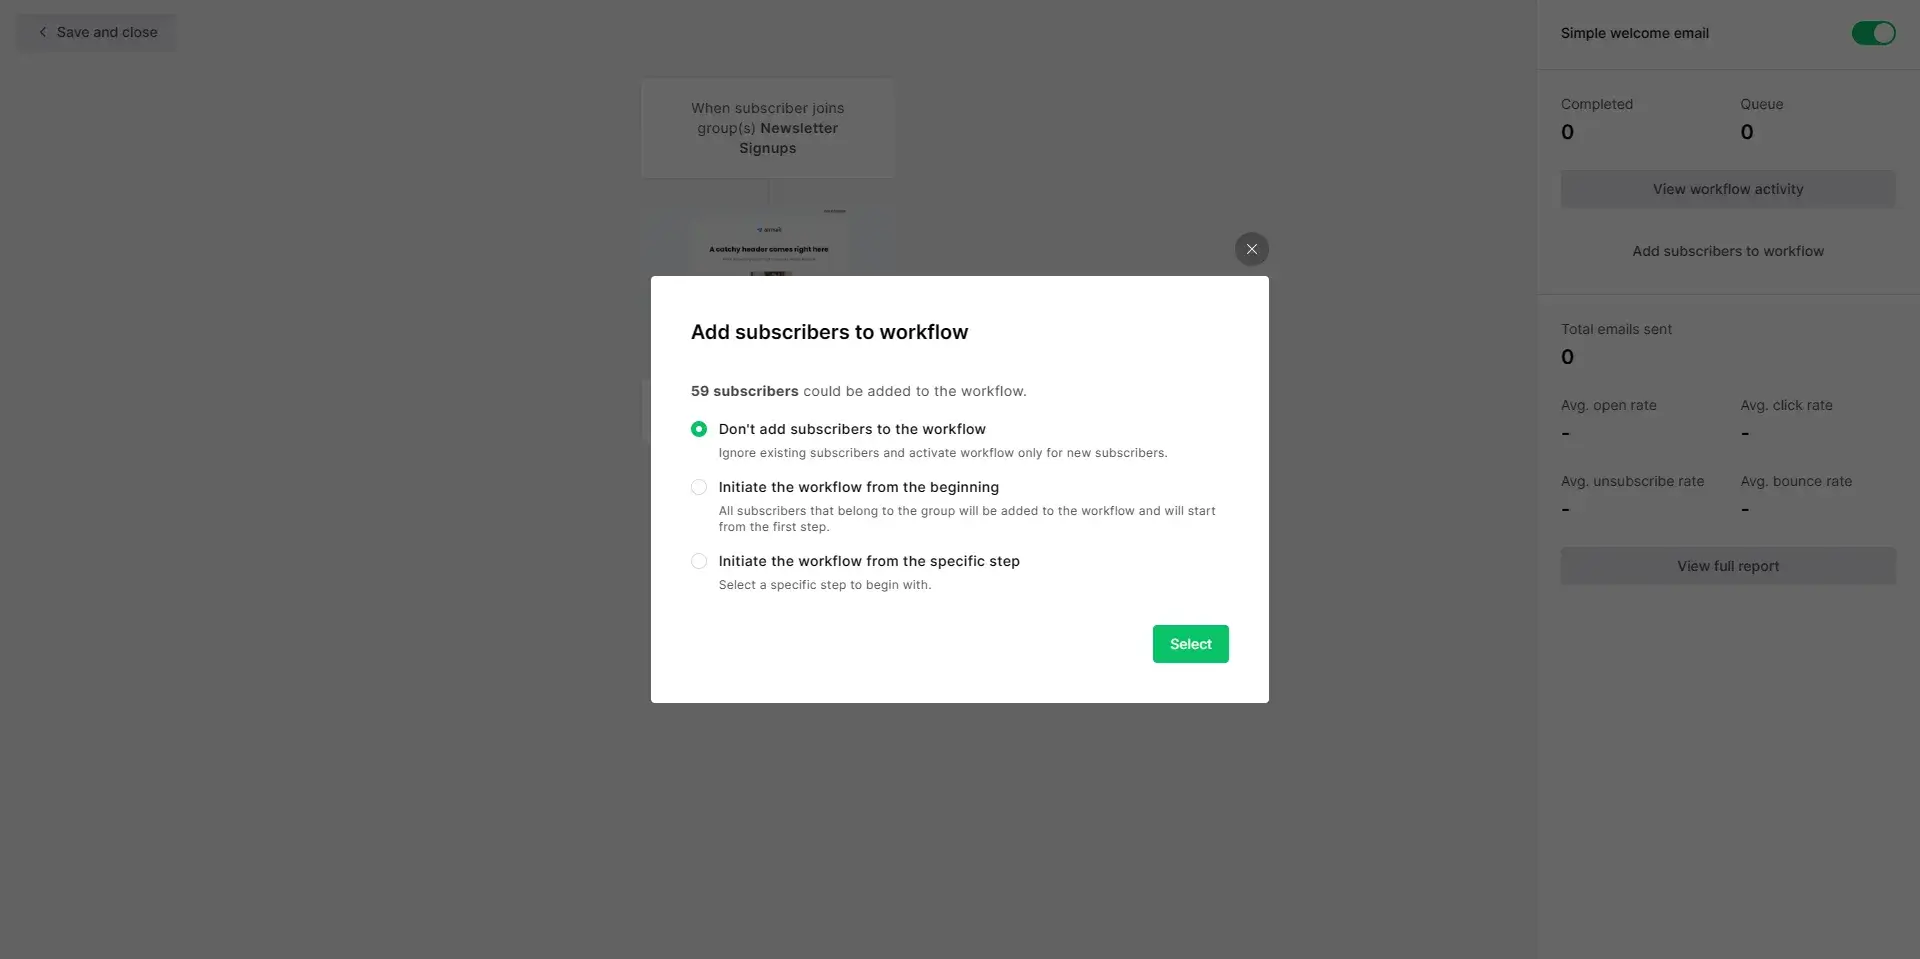
Depending on your choice of trigger for the email automation, you will be able to see how many subscribers can be added to that email workflow,
You can also decide if you would like to add your existing subscribers to the email workflow so that they can get this email automation once it is live,
or if you would like only new subscribers to get the workflow,
There is also an option to specify if you would like to start the workflow from a specific step for a group of subscribers.
Once you are done,
toggle the button at the top right corner to turn on the automation and click on the save button at the top right corner of the workflow dashboard to save your workflow.
Step 9: You’re done!
Your email automation is now active!
The automated sequence can now be sent out automatically whenever a relevant event happens and new subscribers get added to predefined active segments,
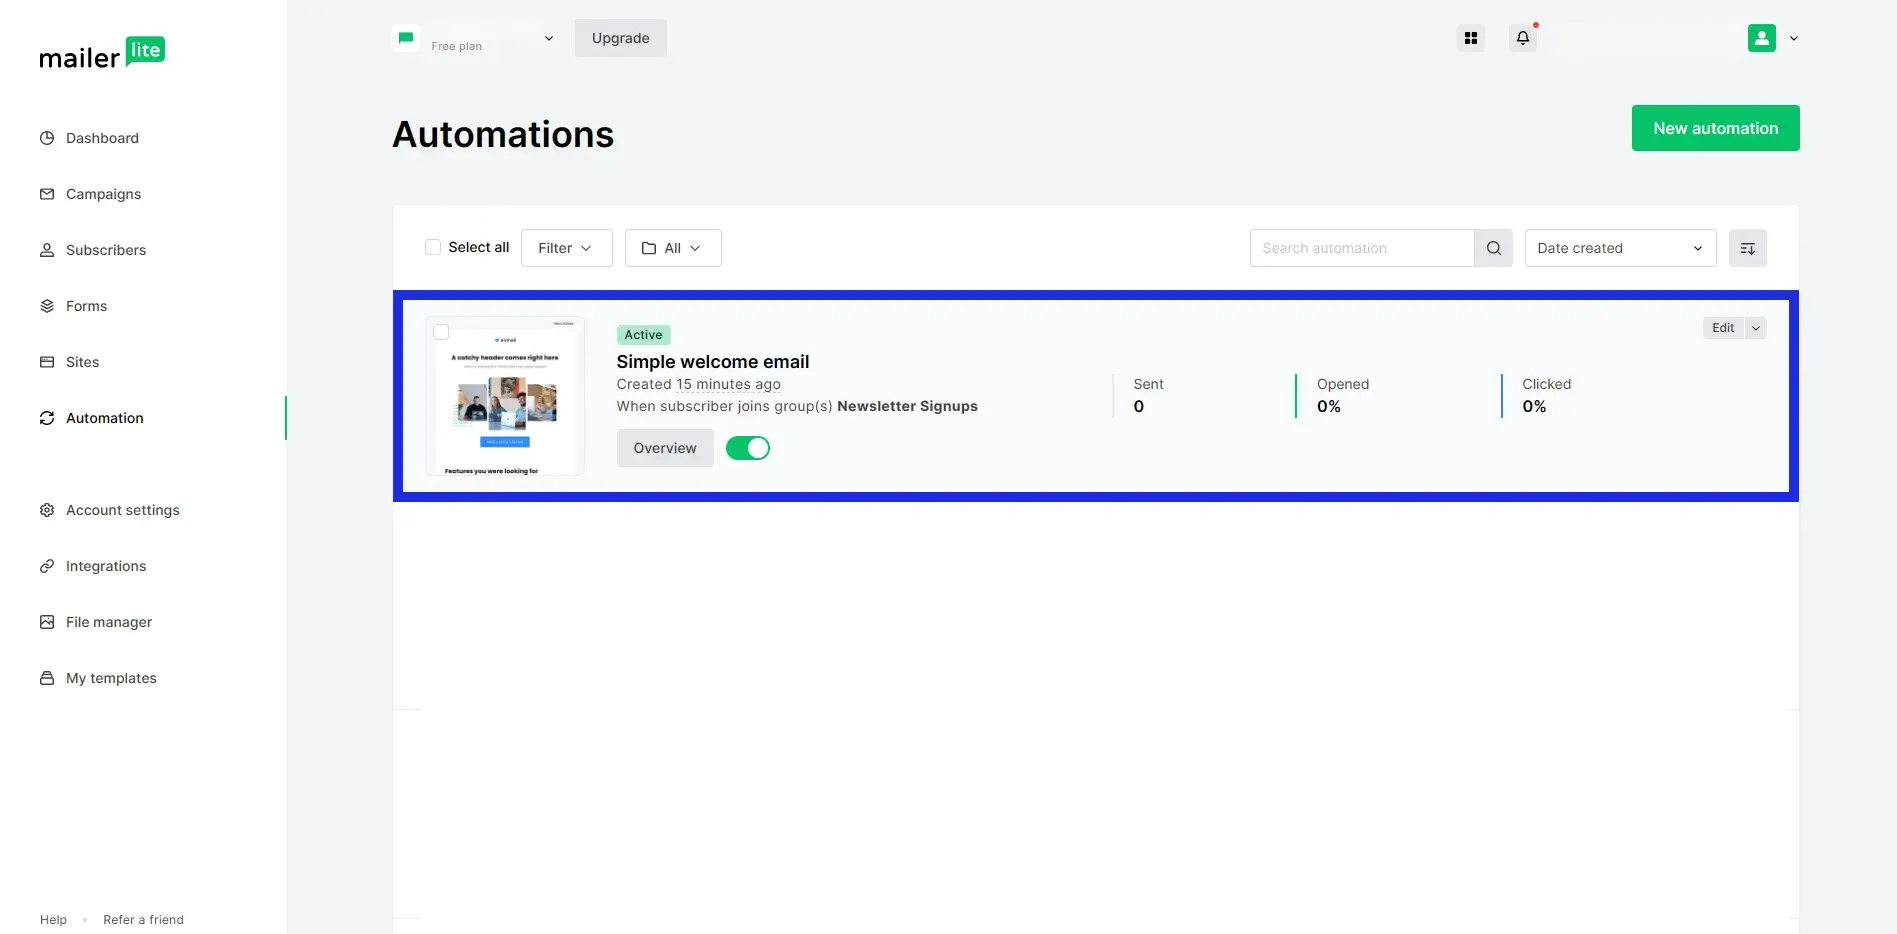
You will automatically be redirected to the automation dashboard where you can see the active automation,
how many emails from your automation have been sent to your subscribers,
and how many subscribers opened your email or clicked on a link in your email.
Conclusion
Mailerlite email marketing software is a powerful choice for a blog’s email marketing needs.
With the ability to build customized email automations, it makes running email campaigns efficient and stress-free.
Its intuitive user interface makes navigating through the dashboard and creating email campaigns quick and easy.
The software also comes equipped with sophisticated analytics that allows you to measure how email automation is performing,
helping you reach more of your target audience.
For bloggers looking to optimize their email marketing efforts, Mailerlite is certainly worth a try.
What email automation tool do you currently use for your blog?, how easy is it in comparison to Mailerlite?
Let me know…leave a comment below…